by Niclas Westling
A while ago David, owner of S/V Gana, called out to the Cruising group, asking for advice/help on improving his electrical installation on his old Folkboat. David admitted that electrics wasn't his strongest side and that the boat he bought had an installation in dire need of attention.
I agreed to take on the job to do some necessary improvements to the boat, whilst keeping to a tight budget.
Some of the problems David experienced were
- navigation lights didn't work
- depth sounder only worked intermittently
- very difficult to troubleshoot the system when things failed, as there was no wiring diagram or labelled wires.
The installation, which David inherited from previous owners, was indeed a bit messy as can be seen in the picture below
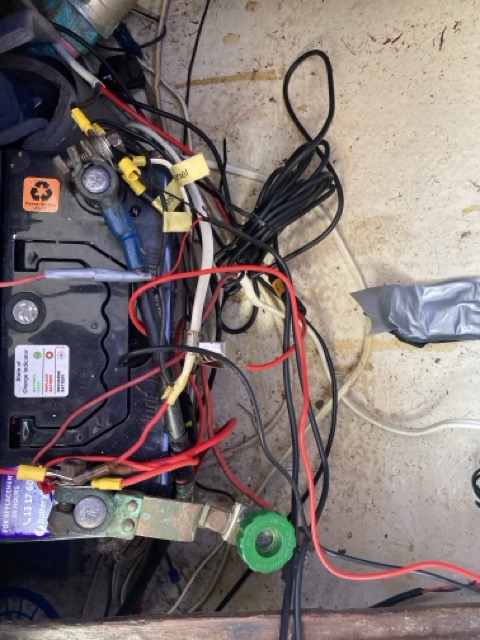
Some of the issues identified were:
- The battery positive pole was not fused, which means a shortcut in the system could easily create a fire
- Most of the wires were not labelled, and generally untidy appearance, making troubleshooting difficult
- Battery terminals loose and way too many direct connections to the battery pole (poor connectivity creating voltage losses and intermittent faults in the system)
- The green battery switch (at the bottom of the picture) was bypassed by many connections, meaning turning it off didn't actually turn off power to the whole system.
- The battery was not enclosed in a battery box, so if the Lead Acid battery would leak that would result in acid leaking into the bilge and creating toxic gases.
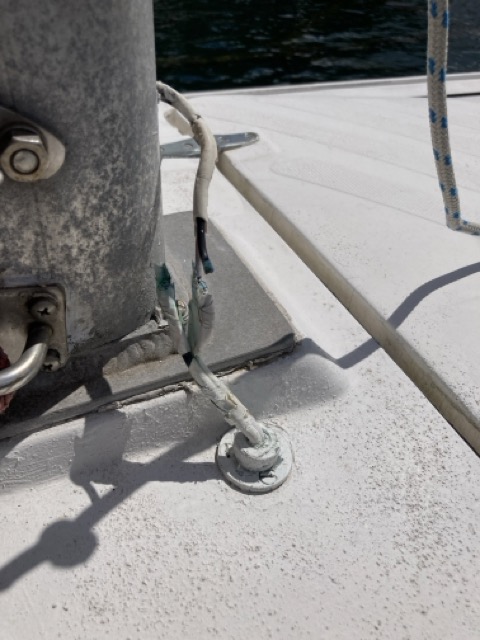
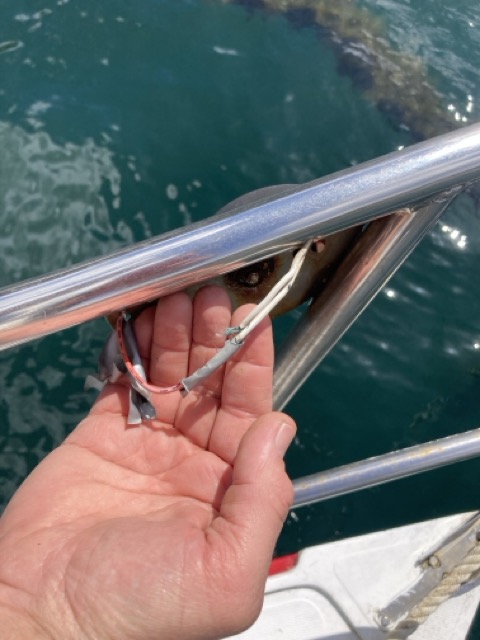
There were also issues with broken wires to nav lights that needed rectifying
Plan of attack to improve things
- Talking through the needs of current and potential future upgrades
- Creating a wiring diagram
- Creating a shopping list of items needed
- Once agreed with David, get on with the installation
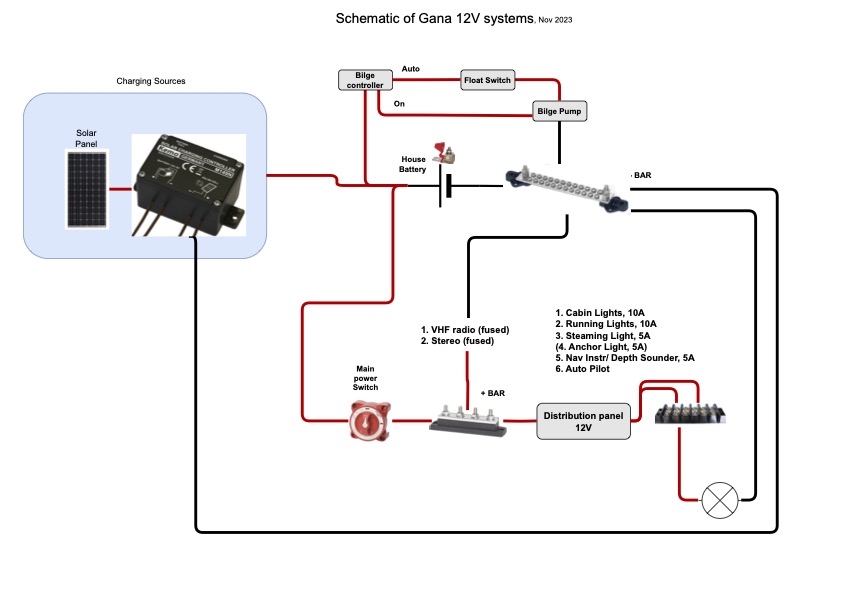
Gana has a very simple setup, without inboard engine and hence no alternator charging. Only one battery and a small solar panel to help keep the battery charge topped up. Cabin lights, anchor light and chart plotter is potential future upgrades. The simplified diagram below, outlines the main components and their connections
I decided to mount power switch, bus bars and terminal blocks on a piece of timber which we glued to the hull, which should give a fairly neat and easy to follow logic of the installation.
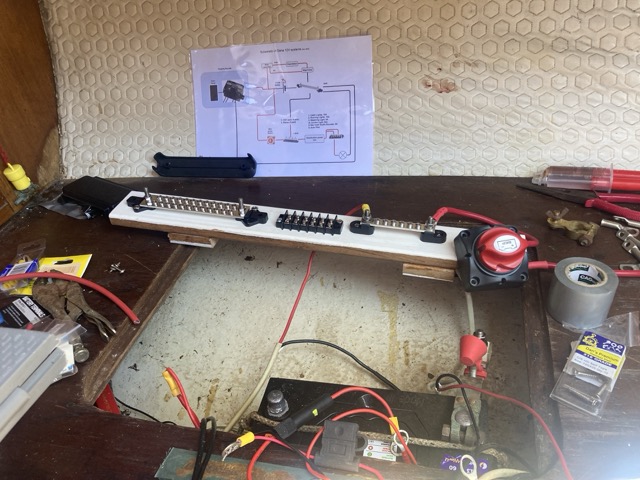
And with the connections all done it looks like this:
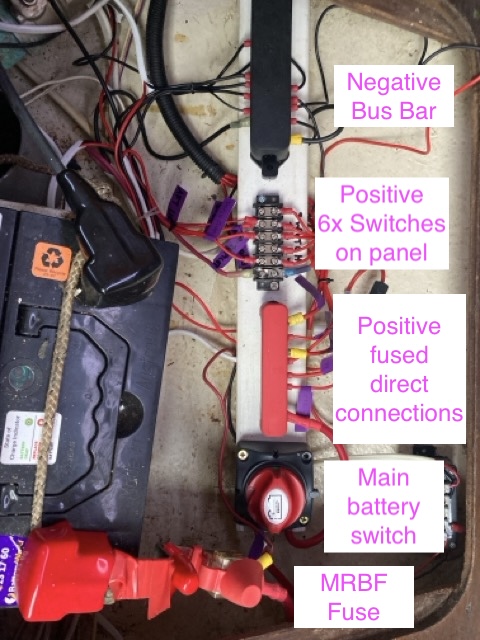
The new installation should mean:
- Much reduced risk of intermittent issues with electrical components with more solid termination of wires
- Ability to switch off the whole system with the battery switch reduces risk for the battery draining with e.g. a forgotten nav light on.
- Simple to connect new devices e.g. cabin lights to the switch panel (negative black wire to the negative bus bar and positive to the switch panel terminal block) without having to access the switch panel itself.
- Easy to troubleshoot for the owner, or next electrician, using a volt meter and well labelled termination points and a laminated diagram of the electric wiring solution.
- The battery terminal fuse reduces risk of fire in case of a short cut
There are still some work that should be done, such as putting the battery in an enclosed box, but that was outside my agreed initial scope of work.
I'm sure our knowledgable readers might have other suggestions on how to further improve it, and some compromises were indeed made due to budget and time constraints, but all in all I'm confident Gana is now set up with a much better electrical installation.
/Niclas
Recent Comments